Connect with Chat Bot
Geting Started
This guide describes the steps to follow to develop the Line Message Bot. In particular, it describes:
► Creating a new provider
► Generate Webhook using our Application
► Upload the Webhook to Line
Important!!
Before Reading the Guideline, your may perapare:
► BotMilky Account (Login)
► Line Developers Console Account (Access)
Creating a new provider
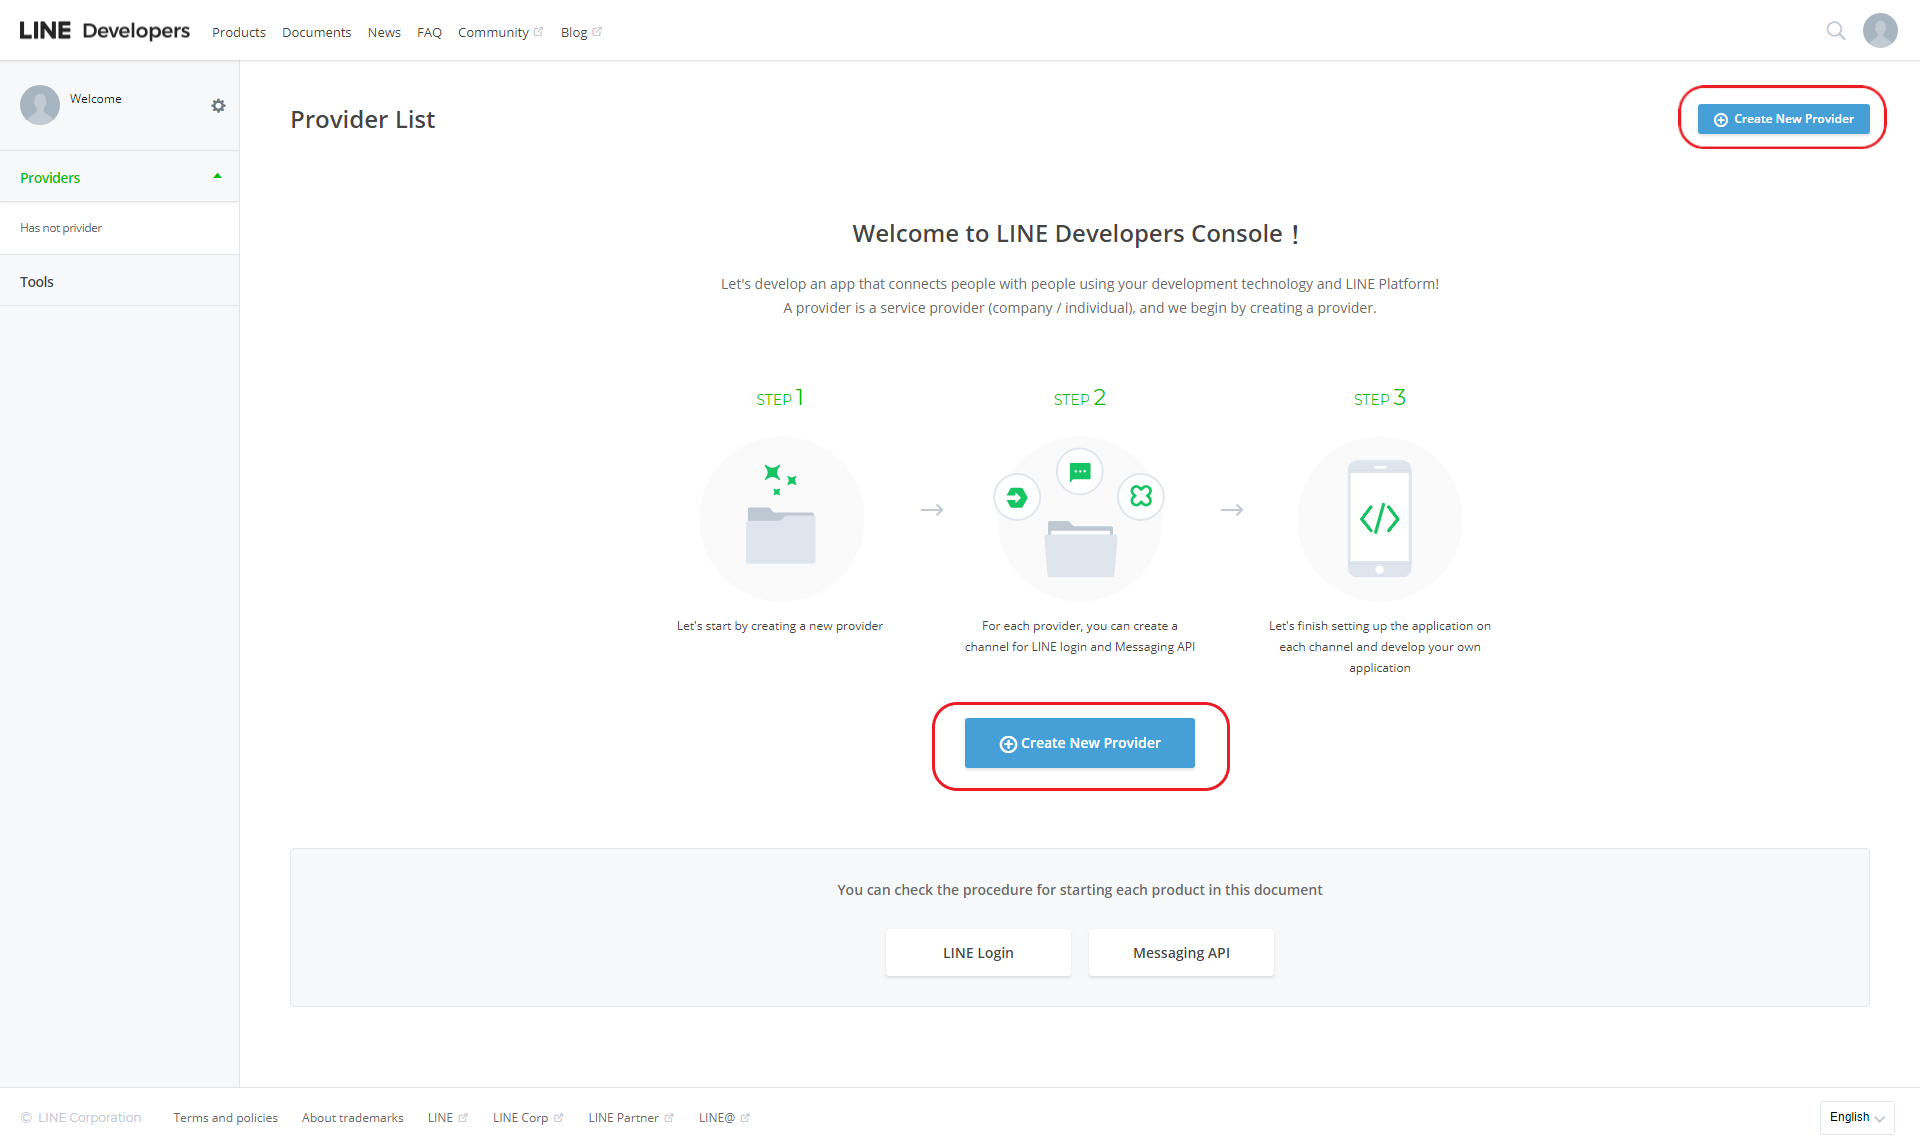
1. Click Create New Provider
2. Input your provider name and Click Confirm
3. Create Confirm

Create a new channel
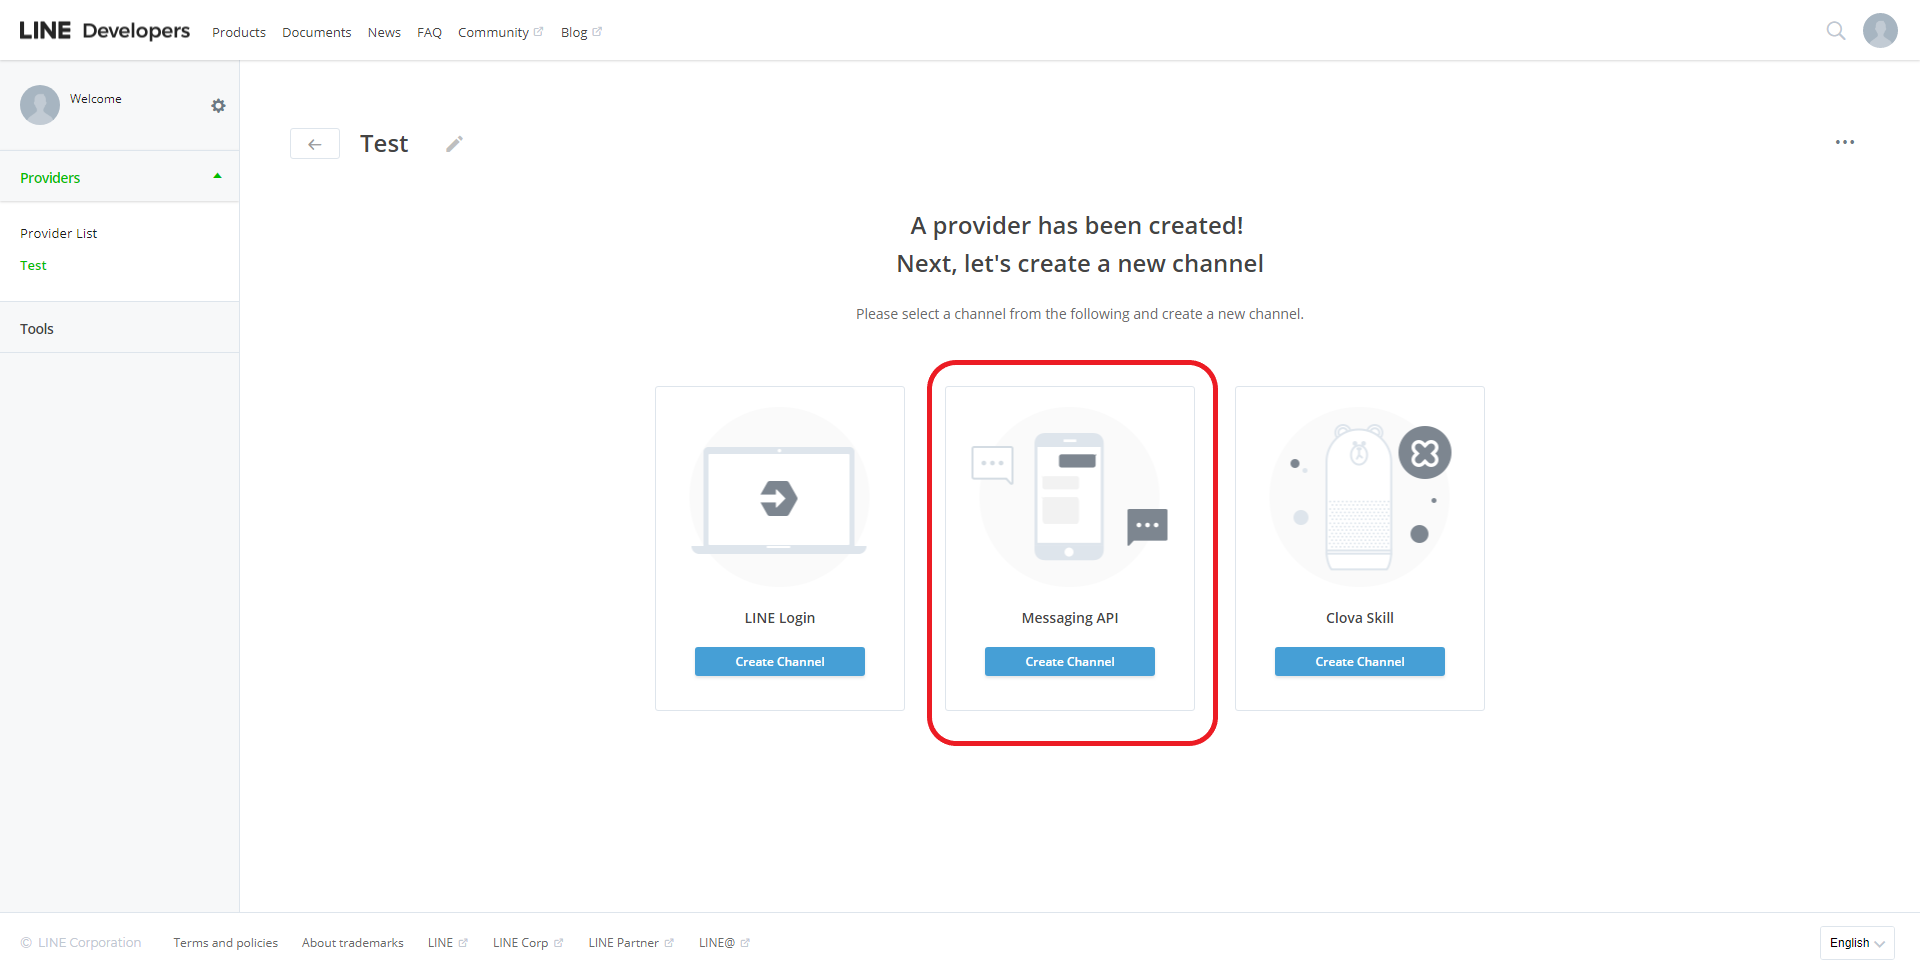
4. Click Create Channel below the Message API
5. Fill in the Form and Click Confirm
6. Review the Information, Tick the User Term and Create the Channel

Generate Webhook using our Application
1. Select your Channel and Enter Channel settings
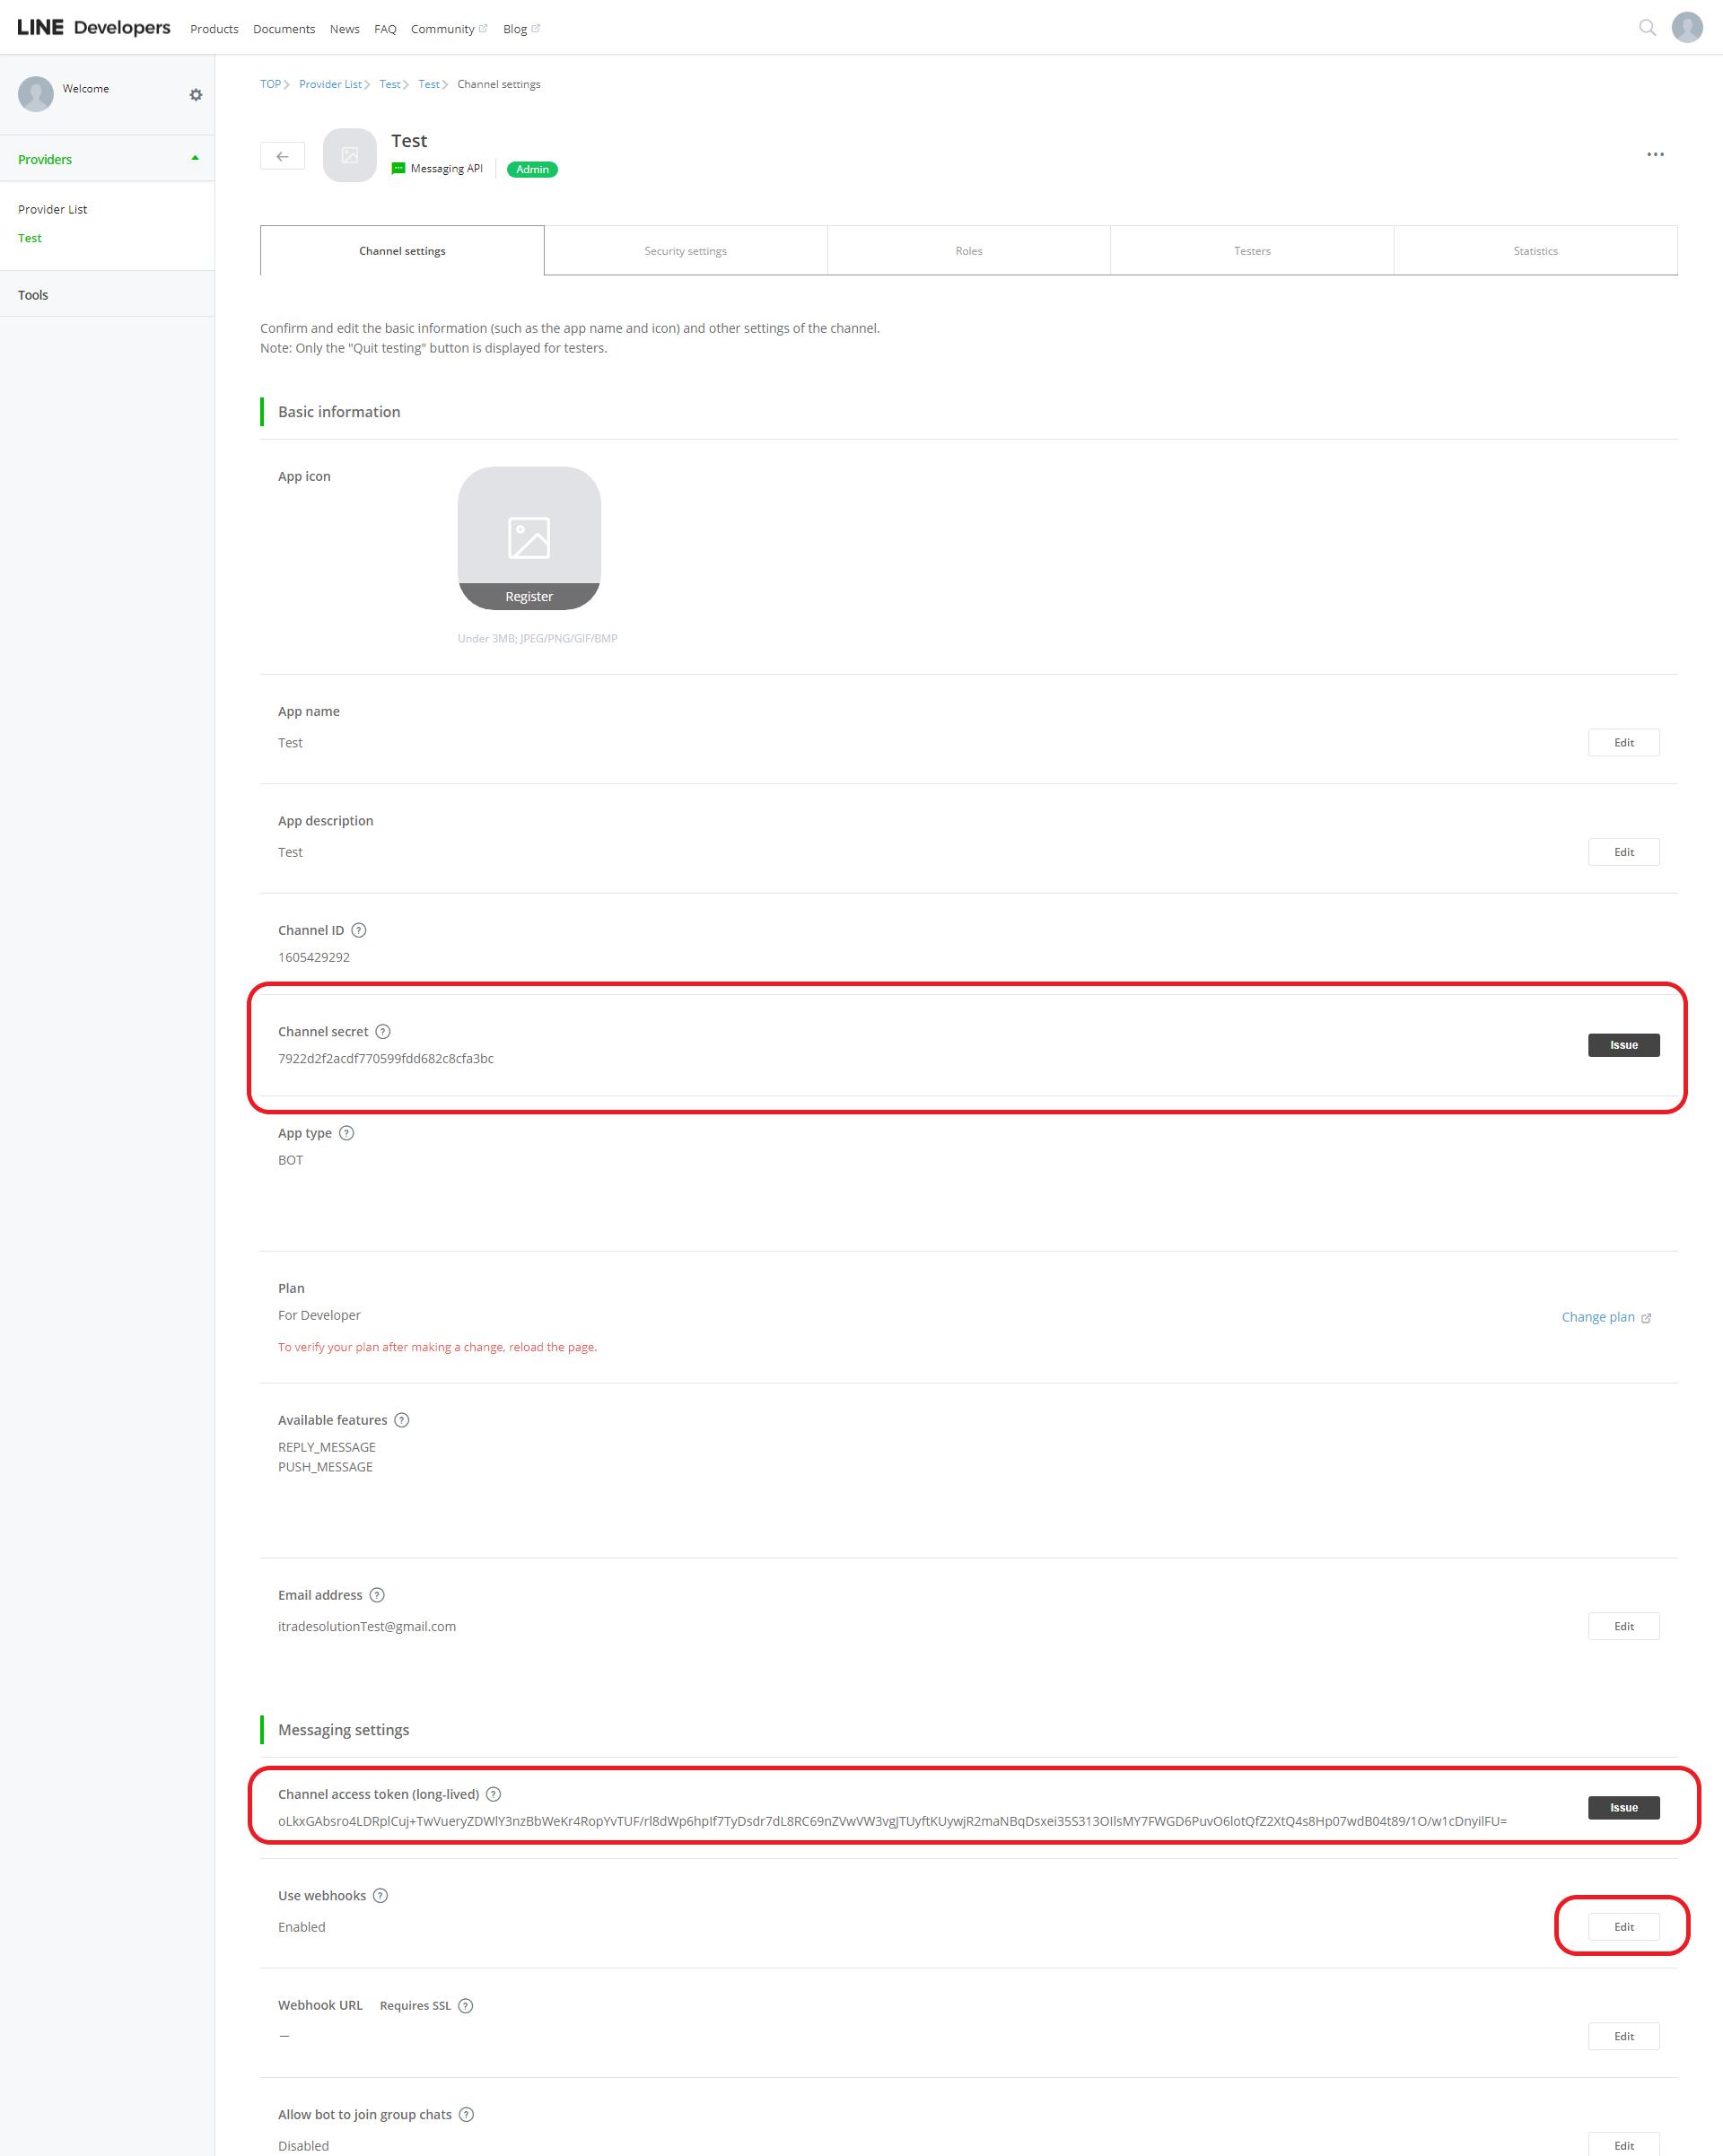
2. Find out the "Use webhooks" row and Edit to Enable
3. Copy Channel access token
4. Paste Channel secret in our Application
5. Copy Channel access token
6. Paste Channel access token in our Application

Upload the Webhook to Line
1. Create your Webhook URL after input the Channel Secret and access token
2. Copy your Webhook URL
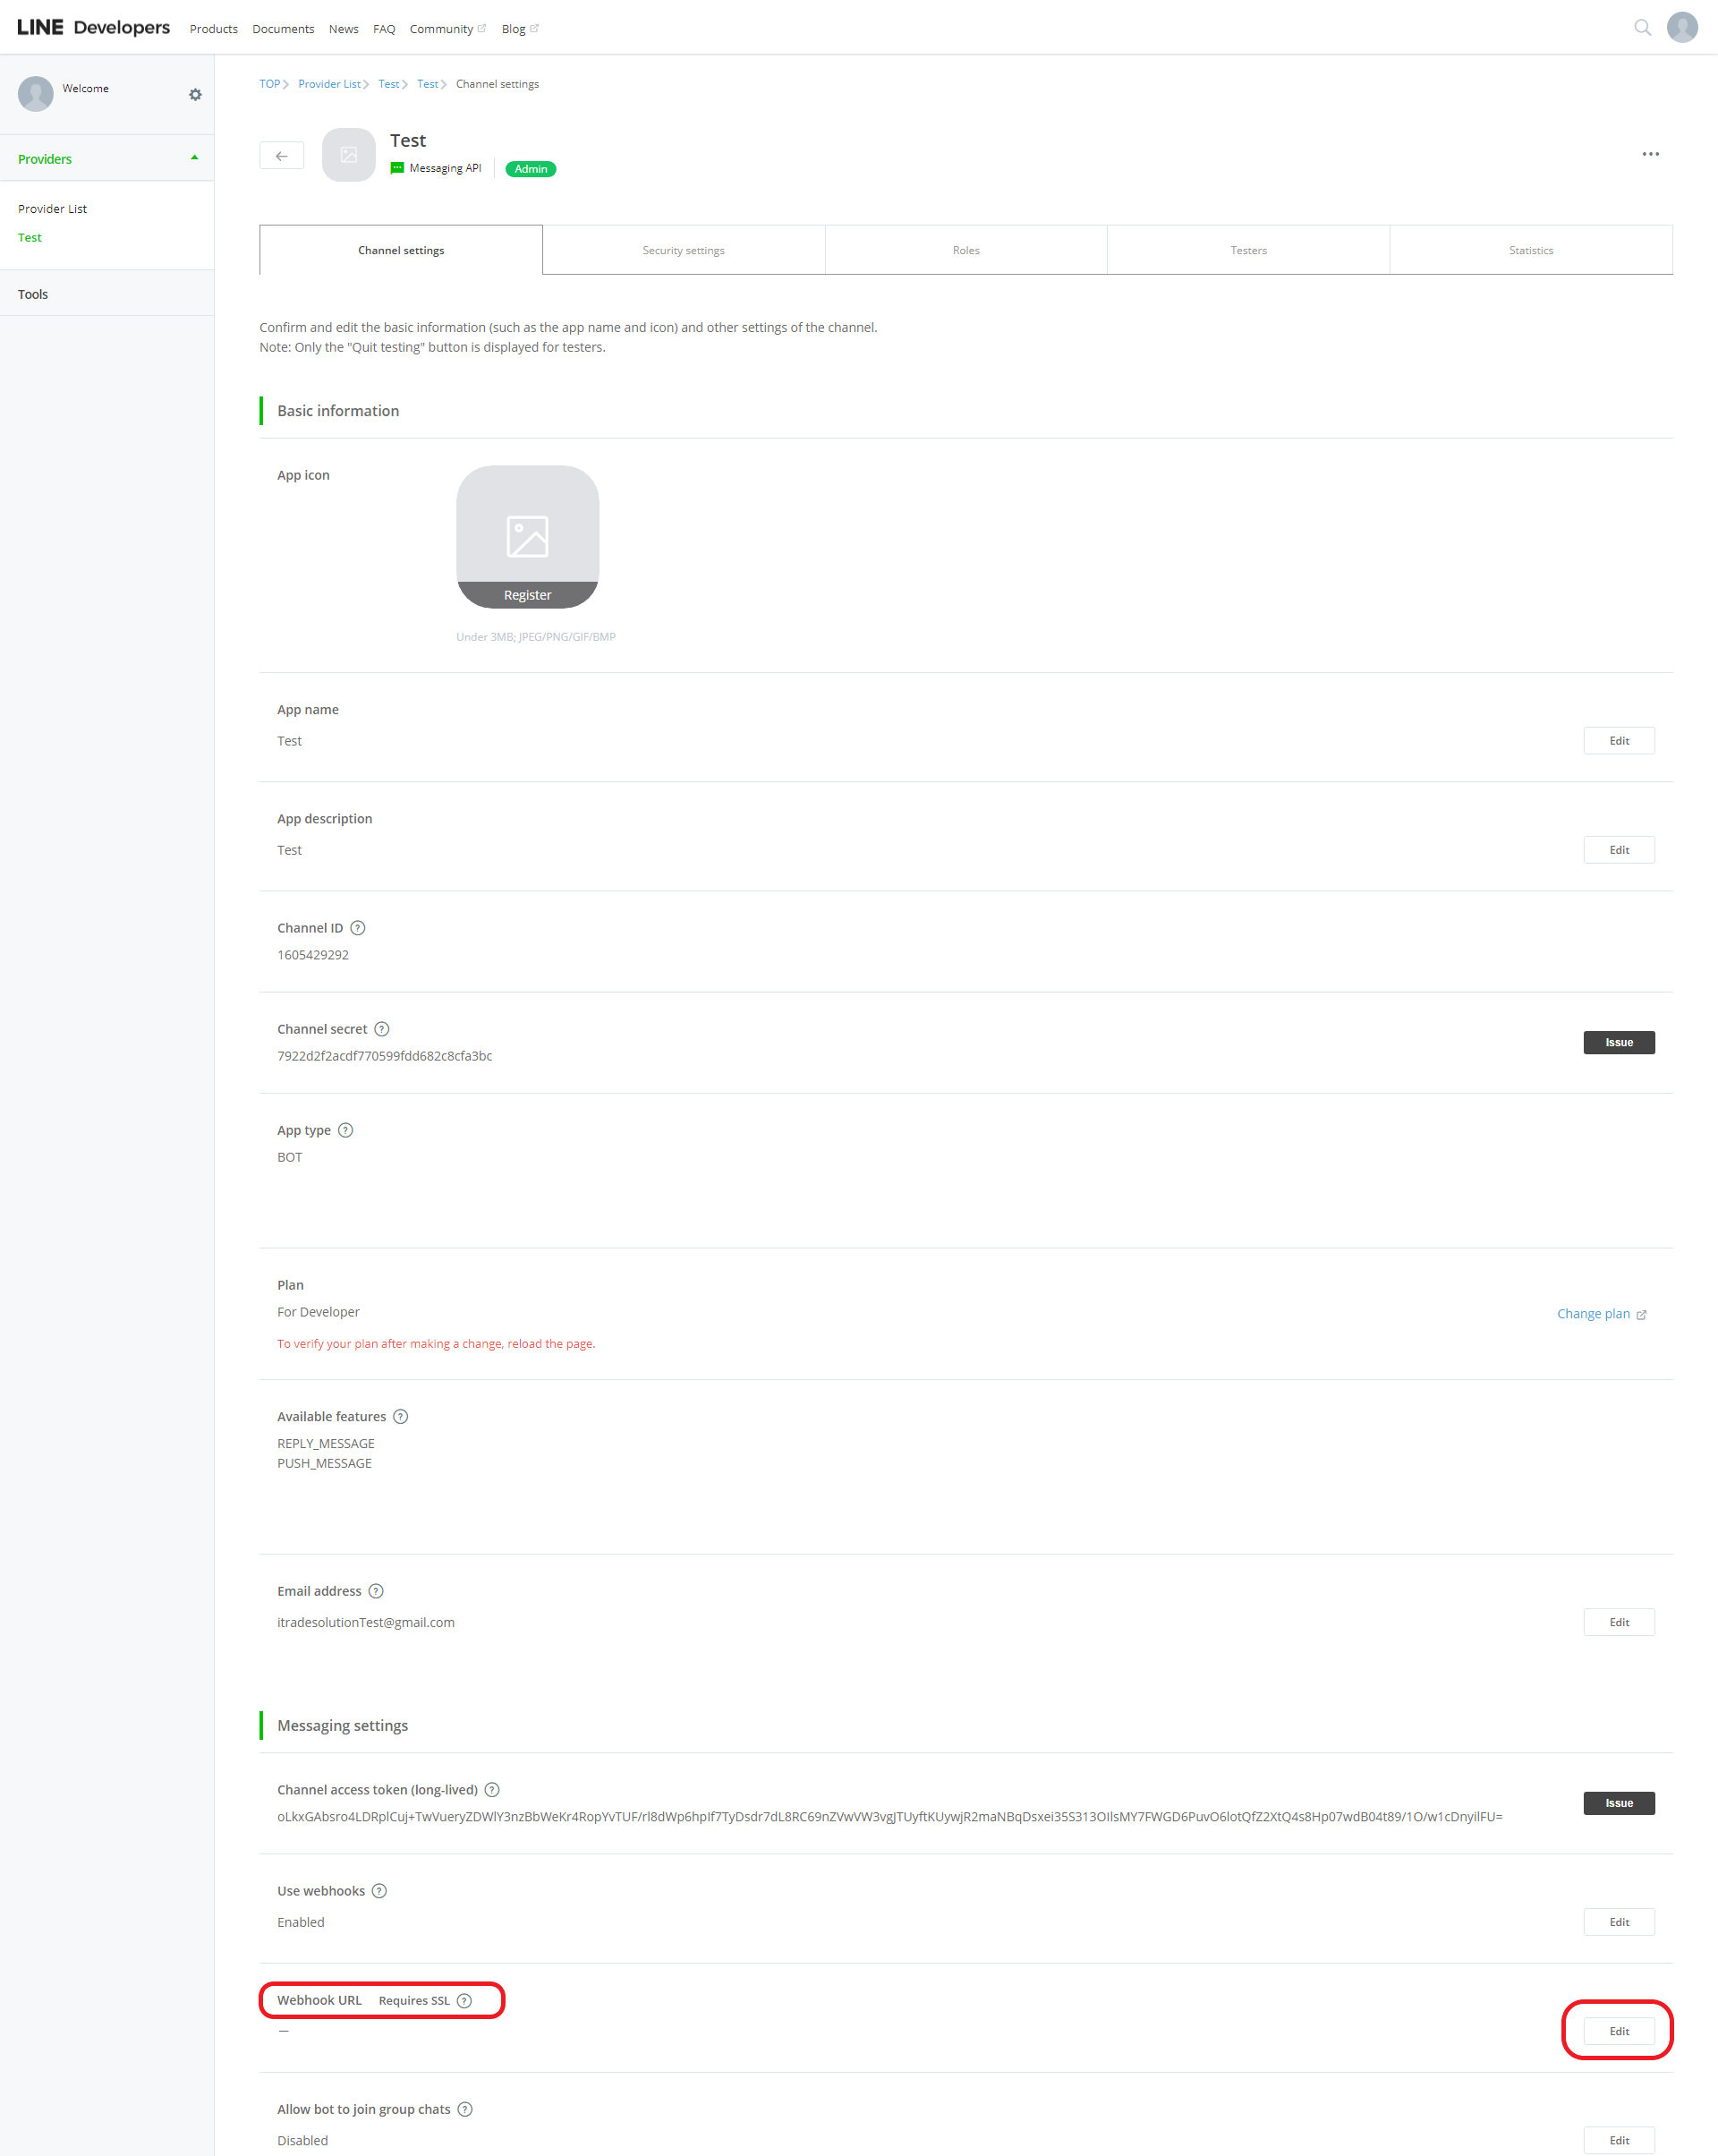
3. Find out "Webhook URL" in Line Developers Console
4. Edit and Paste the URL
5. Finish

Additional!!
After Set up the Webhook, you may want to
► Set the Keyword and Content
Set the Keyword and Content (Web)
1. Login to BotMilky
2. Locate the Enter Data
3. Key in the Keyword and Content
4. Save
Set the Keyword and Content (Mobile)
1. Launch and Login to BotMilky Application
2. Switch to Keyword Page (Frist Page after the Login)
3. Click "New" Button
4. Enter the Keyword
5. Click "Next" Button
6. Enter the Content
7. Click "Save" Button
► Test the Bot
1. Find out QR code of your bot in Line Developer Account (Channel settings)
2. Scan your QR code using Line
3. Chat with the bot using Line
4. Test your Keyword